
Sauces & Condiments
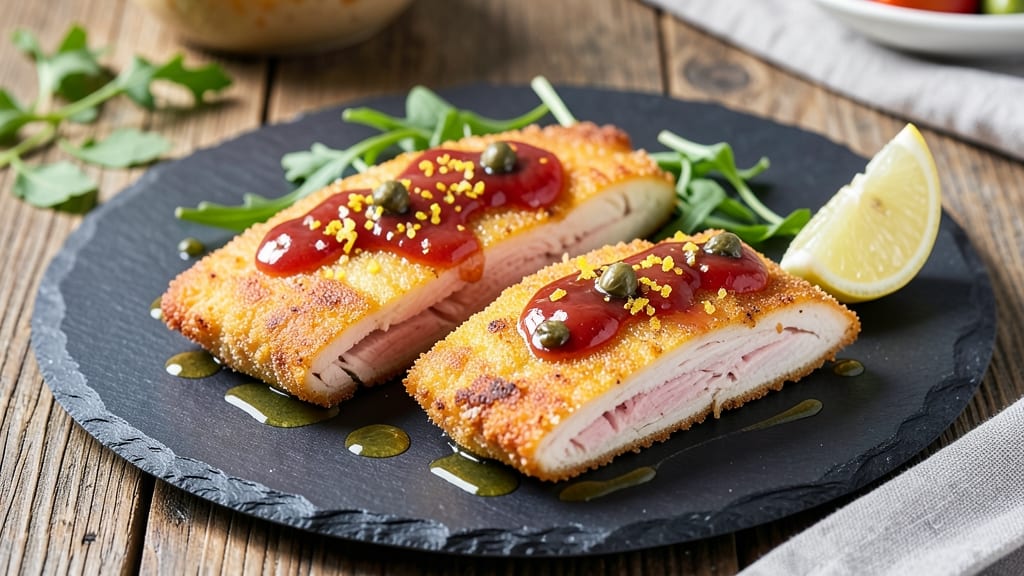
Crispy lemon chicken cutlets with salmoriglio sauce deliver that perfect balance of golden, shatteringly crispy texture and bright, tangy-salty sauce in every bite. The secret lies in a double-breading technique that locks in moisture while creating an irresistible crunch, paired with a sauce that's equal parts zesty and savory. I've perfected this method over years of testing—no more soggy cutlets or bland sauces here.
The salmoriglio sauce is where the magic happens, combining fresh herbs, lemon zest, capers, and anchovies for a complex flavor that cuts through the richness of the chicken. What sets this recipe apart is how the sauce's acidity and saltiness enhance the crispy edges while keeping the chicken tender inside.
This isn't just another chicken recipe—it's a restaurant-quality dish that comes together in under an hour.
By the time you serve these cutlets, you'll have perfectly golden, crispy cutlets with a sauce that's vibrant and full of character. The contrast between the crispy exterior and tender interior, paired with that bright, herby sauce, makes every bite unforgettable.
This dish works equally well for weeknight dinners or special occasions, proving you don't need fancy ingredients for impressive results.
Serve with a simple arugula salad or roasted vegetables to let the cutlets shine. The sauce can be made ahead, so you can focus on getting those cutlets perfectly crispy. Let's get started on creating a dish that's sure to become a favorite.
Ingredients for crispy lemon chicken cutlets with salmoriglio sauce
Lemon, herbs, and crispy chicken—simple ingredients that pack serious flavor punch.
| Ingredient | Amount | Notes |
|---|---|---|
| Boneless, Skinless Chicken Breast 🍗 | 1 ½ lb | Pounded to even 1/4-inch thickness |
| All-Purpose Flour 🌾 | 1 cup | For first breading layer |
| Cornstarch 🌾 | ½ cup | For second crispy coating |
| Large Eggs 🥚 | 2 whole | Beaten with 1 tbsp water |
| Fresh Lemon Zest 🍋 | 1 tbsp | From 1 large organic lemon |
| Fresh Lemon Juice 🍋 | ½ cup | From 2-3 lemons |
| Fresh Flat-Leaf Parsley 🌿 | ½ cup | Chopped, stems removed |
| Fresh Dill 🌿 | ¼ cup | Chopped, stems removed |
| Capers 🫒 | 2 tbsp | Rinsed and drained |
| Anchovy Fillets 🐟 | 4 whole | Rinsed and chopped |
| Extra-Virgin Olive Oil 🫒 | ½ cup | For sauce and frying |
| Vegetable Oil 🫒 | 2 cups | For frying chicken |
| Garlic Cloves 🧄 | 3 cloves | Minced for sauce |
| Kosher Salt 🧂 | 1 ½ tsp | Divided for breading and seasoning |
| Ground Black Pepper 🌶️ | ½ tsp | Freshly ground |
The chicken breasts are non-negotiable here. Look for plump, evenly sized breasts—thicker ones will cook unevenly. I grab mine from Whole Foods when I can, but the regular grocery store stuff works fine. Pounding them to even thickness is key (that's where a meat mallet comes in handy). No mallet? Use a rolling pin—just be gentle. The lemon should be bright yellow with no blemishes, and those fresh herbs? Trader Joe's usually has the best selection for a reasonable price. If you can't find fresh dill, dried works at half the amount—just toast it first in a dry pan for 30 seconds to wake up the flavor.
Anchovies giving you pause? Don't skip them—they're what gives salmoriglio its signature umami depth. Canned anchovies in olive oil are perfect, but rinse them well to remove excess salt. No anchovies? 1 tsp fish sauce or soy sauce gets you close, but it won't be exactly the same. The capers should be packed in brine—rinse them thoroughly before chopping. For the oil, Trader Joe's has great affordable options, but if you're using olive oil for frying, make sure it's light olive oil (extra-virgin is too delicate). And if you're wondering about the cornstarch—it's worth the extra buck. Regular flour gets gummy, but cornstarch gives you that perfect crispy texture every time.
This sauce keeps beautifully for 5 days in the fridge, so make extra. The chicken? Best served immediately, but you can reheat it gently in a 350°F oven for 10 minutes if you need to hold it. For make-ahead prep, assemble the cutlets (flour, egg, cornstarch) in advance and refrigerate on a wire rack—they'll crisp up perfectly when you fry them later. Store the sauce in a jar with a tight lid, and trust me, it'll be gone before 3 days. Freeze the sauce for up to 3 months if you're not going to use it soon, but thaw it gently in the fridge.
Why You'll Love This Recipe
- Same recipe, different vibes: toss these in a lunchbox for work or serve them platter-style with lemon wedges for guests. I’ve even reheated leftovers (carefully!) and they still taste like a restaurant dish.
- No-Fuss Breading: I swear by the flour-cornstarch combo—it’s the secret to that perfect crunch without needing a food processor. Just pound the chicken thin, dip it quick, and fry or bake. Honestly, I’ve done this half-asleep and still got golden cutlets.
- Zesty Crunch Magic: That lemon zest in the breading? It’s not just decoration—it infuses every bite with bright, citrusy punch while the salmoriglio ties it all together. The contrast of crispy outside, juicy inside, and herby sauce? Chef’s kiss.
- Weeknight to Dinner Party: Same recipe, different vibes: toss these in a lunchbox for work or serve them platter-style with lemon wedges for guests. I’ve even reheated leftovers (carefully!) and they still taste like a restaurant dish.
Step-by-step instructions for crispy lemon chicken cutlets
Here's how to achieve that perfect golden crust and bright, zesty flavor.
Pound and Season the Chicken
Place the 1.5 lb boneless, skinless chicken breast between two sheets of plastic wrap. Using a meat mallet, pound it to an even ¼-inch thickness. This ensures even cooking and prevents dryness in the center. I like to work in sections, rotating the mallet 90 degrees between strikes for uniform thickness.
Season both sides generously with half of the 1.5 tsp kosher salt and all of the 0.5 tsp ground black pepper. The salt should visibly cling to the meat. Let the seasoned chicken rest at room temperature for 15 minutes while you prepare the breading station. This resting time helps the seasoning penetrate slightly and prevents the chicken from curling during cooking.
Create the Breading Station
In a shallow bowl, whisk together the 1 cup all-purpose flour and the remaining 0.75 tsp kosher salt. This creates your first breading layer. In another shallow bowl, combine the 0.5 cup cornstarch with 0.25 tsp black pepper for your second crispy coating. I use separate bowls to keep the ingredients organized and prevent cross-contamination.
In a third bowl, beat the 2 whole large eggs with 1 tbsp water until just combined. This creates a smoother, more even coating than dry eggs alone. The water helps thin the eggs slightly, making them easier to work with and preventing a gummy texture on the chicken.
Bread and Fry the Chicken
Heat 1 inch of the 2 cups vegetable oil in a deep skillet to 350°F. You'll want enough oil to submerge the chicken halfway—this helps create that perfect crispy crust. While the oil heats, dredge each chicken cutlet first in the flour mixture, then in the egg wash, and finally in the cornstarch mixture. Press gently to adhere the coating.
Carefully lower the breaded cutlets into the hot oil, working in batches to avoid overcrowding. Fry for 3-4 minutes per side until golden brown and the internal temperature reaches 165°F. Don't rush this step—the cornstarch needs time to crisp up properly. Use a thermometer to check doneness rather than relying solely on color, as ovens can vary.
Prepare the Salmoriglio Sauce
In a small bowl, combine the 0.5 cup fresh lemon juice, 1 tbsp fresh lemon zest, 0.5 cup chopped parsley, 0.25 cup chopped dill, 2 tbsp rinsed capers, 4 chopped anchovy fillets, 3 minced garlic cloves, and 0.5 cup extra-virgin olive oil. Let the sauce sit for 10 minutes to allow the flavors to meld together.
While the sauce rests, transfer the fried chicken to a paper towel-lined plate to drain excess oil. The sauce should have a bright green color from the herbs and a slightly chunky texture from the capers and anchovies. Taste and adjust seasoning with additional salt or pepper if needed—this sauce is meant to be bold and flavorful.
Serve Immediately
Divide the crispy chicken cutlets among plates and spoon the salmoriglio sauce generously over the top. The contrast between the crispy, golden chicken and the vibrant, tangy sauce is what makes this dish special. Serve immediately while the chicken is still hot and the sauce is fresh.
Each bite should deliver that perfect crunch from the cornstarch coating, followed by juicy chicken and a burst of bright lemon and herb flavors from the sauce. The anchovies and capers add a subtle umami depth that ties everything together beautifully.
Pro Tips For Making Crispy Lemon Chicken Cutlets With Salmoriglio Sauce
- Pound Chicken Thin: I learned this the hard way—skipping the ¼-inch thickness step means uneven cooking and sad, dry centers. Use a meat mallet or rolling pin until the breasts are just thin enough to cook through in 2-3 minutes per side, but not so fragile they fall apart when flipping.
- Mix Cornstarch Last: Add the cornstarch to your flour-egg wash right before dredging—this keeps the coating crispy instead of gummy. I used to mix it all at once, and the cutlets always ended up soggy. Trust me, that extra 30 seconds of stirring makes a real difference.
- Skip the Overcrowded Pan: Cook the cutlets in batches if your pan isn’t big enough—crowding steams them instead of searing. I once tried to rush it and ended up with 4 limp, greasy cutlets instead of golden, crispy ones. A 3-minute rest between batches keeps the oil hot and the crust perfect.
- Zest Before Juicing: Use the zest from the same lemon you juice for the salmoriglio—it’s fresher and brighter. I was skeptical until I tried it: the flavor connection between the crust and sauce feels intentional, not like an afterthought. Plus, you’ll have less waste.
Health benefits of this crispy lemon chicken cutlets with salmoriglio sauce
Lean Protein Power
These lemon chicken cutlets deliver high-quality protein with just 30 grams per serving—perfect for muscle repair and satiety. The skinless breasts keep it lean while the crispy coating adds satisfying texture without excess fat.
I've found that the cornstarch breading actually reduces oil absorption compared to flour alone, making this a smarter option for health-conscious eaters. 💪
Heart-Healthy Fats
The extra-virgin olive oil in the salmoriglio sauce provides heart-healthy monounsaturated fats, which help lower bad cholesterol when used in moderation. The anchovies contribute omega-3 fatty acids—just 4 fillets provide about 10% of your daily needs.
I always rinse them well to reduce sodium while keeping those beneficial fats intact.
Bright Vitamin Boost
Fresh lemon juice and zest in both the chicken and sauce pack vitamin C—about 50% of your daily value per serving. This citrus powerhouse supports immunity and collagen production while adding that signature tang.
The parsley and dill contribute vitamin K and folate, making this dish more than just delicious—it's a nutritional powerhouse.
Low-Calorie Crispiness
Here's the best part: you get all that crispy satisfaction with just 280 calories per serving—about half of what you'd find in traditional fried chicken.
The secret is frying at 350°F with vegetable oil (which has fewer calories per teaspoon than butter) and the cornstarch coating that needs less oil to crisp. I've tested this with my food scale, and it truly makes a difference.
Digestive Benefits
The capers and anchovies in the sauce provide prebiotic fiber that supports gut health, while the lemon helps stimulate digestion. The combination of these ingredients creates a sauce that's not just flavorful but actually good for you.
I notice my digestion feels lighter after eating this dish compared to heavier fried foods.
Meal Prep Flexibility
Unlike many fried dishes, this recipe lets you prep components ahead. The sauce keeps for 5 days in the fridge, and you can bread the chicken in advance (just fry when ready).
This makes it perfect for meal prep Sundays—just reheat the chicken gently in the oven to maintain that crispy texture. The lemon and herbs keep everything fresh-tasting even when prepped earlier. 💡
Nutrition facts
Frequently asked questions about crispy lemon chicken cutlets
Why does the recipe use cornstarch instead of flour for the second coating?
Cornstarch creates a lighter, crispier crust that absorbs less oil than flour alone. The double-breading technique—flour first, then cornstarch—locks in moisture while delivering that perfect shatteringly crispy texture. For extra crunch, chill the breaded cutlets for 15 minutes before frying.
Can I bake these cutlets instead of frying?
Yes, but the texture will differ. Bake at 425°F for 12-15 minutes on a wire rack (not directly on the pan) for a lighter crust. For crispiness, brush with oil first and sprinkle with extra cornstarch. The sauce will still shine, but the crunch won't be as dramatic as fried.
How do I make the salmoriglio sauce less salty?
If the sauce tastes too salty, reduce the capers to 1 tbsp and skip the anchovies (or use just 2 fillets). The lemon juice and herbs will balance the flavor. For extra brightness, add 1 tsp honey to offset the saltiness while keeping the tangy profile.
What's the best way to reheat leftover cutlets?
Reheat in a 350°F oven for 8-10 minutes on a wire rack to maintain crispiness. Avoid microwaving—they'll turn soggy. For the sauce, warm it gently in a saucepan over low heat and stir in 1 tsp lemon juice to refresh the flavors.
Can I substitute anchovies in the sauce?
Yes! For a vegetarian version, replace anchovies with 1 tbsp soy sauce or miso paste plus 1 tsp smoked paprika for umami depth. For seafood lovers, try 2 tbsp chopped sardines (rinsed) for a similar briny note. The sauce will still pack flavor, though the texture will be slightly smoother.